|
Do It Yourself Boat Repair: Emergency Zodiac Boat RepairDo it yourself boat repairs or emergency repairs are sometimes necessary, and with a little care and planning you can do a good job. The details.... Here is a basic do it yourself boat repair kit for a Hypalon boat. If you have a PVC boat you need a small container of MEK or Acetone in your kit to prepare the surface for a patch, rather than a buffing tool. With Hypalon the small abrasive stone was supplied to buff the material before gluing. Many sources claim you must wipe off Hypalon after buffing with a solvent.... other sources say do not do this as it weakens the bond. 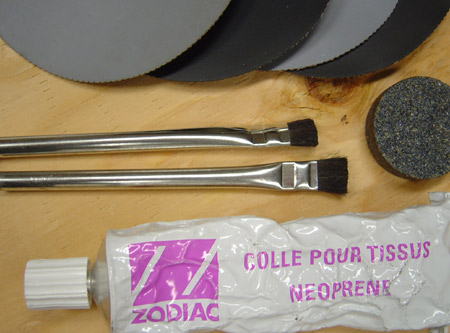
Glue - make sure you are using the correct glue for the type of material on your boat. Using the incorrect glue or old glue will create a poor bond in do it yourself boat repair. Glues suitable for PVC and Polyurethane include:
Glues suitable for Hypalon and Neoprene include:
Some glues, like Clifton and Polymarine can be used as a one part adhesive or you can add an accelerator, or curing agent which speeds up the bonding process and creates a stronger bond. Remember that most glues have a limited shelf life (usually one to two years), so that old tube in your do it yourself boat repair kit may be way past its useful life. Temperature and Humidity - Temperature must be in the range of 18 to 24 degrees C (65 to 75 degrees F) and humidity must be below 70%. 40% humidity would be better. This is very important as bond strength will decrease greatly with heat and humidity. If you are attempting do it yourself boat repair move your boat away from the waters edge before completing the repair, and don't try to do it in the heat of a summer day. Wait until evening. Size of the patch - A patch should extend 25 to 50 mm on all sides of the tear (1 to 2 inches) Bigger is better. If the tear is less than 50mm (2inches) long then an inside patch is not necessary. Inside patches add strength to the repair. Make sure you cut the patch with rounded corners to decrease the possibility of corners catching and stressing the patch. Preparation - Place the patch on the tear and trace around the patch so you know where to clean and glue the tube material. Use masking tape to protect the area outside the patch as the glue is very hard to clean off. For PVC boats clean the area to be patched with MEK (methyl ethyl ketone). The MEK actually dissolves the PVC, so use it sparingly as too much may loosen the coating completely off the fabric! For Hypalon boats buff the fabric using a 36 grit or 60 grit abrasive wheel. Buffing by hand ensures you will not go through the coating and into the fabric. Buff the Hypalon until all the shiny coating is covered with scratches. Buff in more than one direction. Gluing - If using a 2 part glue mix in the ratio required, it varies with glue manufacturers. Accelerator increases the glue strength, but too much accelerator decreases the bond strength. Read the instructions from the manufacturer, different repair shops use different glues and I have read recommended amounts varying from less than 1% to 10%. Don't take my advice, or any repair shop advice, read the manufacturer's instructions! Apply two or three coats of glue to the tube and to the patch, allowing the glue to dry between coats (depending on the glue and environmental conditions). Again some repair shops recommend three coats of glue ... others use only two. Apply the glue with a natural bristle brush. They work much better if you cut the bristles short. Acid brushes from the plumbing shop work great, or inexpensive natural bristle brushes. 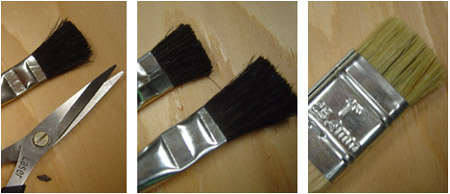
After the glue has dried, if there is a milky color to the glue, that means there is too much humidity so do not try to apply the patch, the moisture must be removed first. Let the first coat dry very well, even overnight. The final coat should dry until just tacky. Just tacky, means it has a gummy feel but does not stick to a gloved finger. Testing for tacky with your fingertip can contaminate the glue. use a glove or your knuckle. Not letting the glue dry long enough is a common error with do it yourself boat repair. Adhesives mixed with accelerator cure much faster than adhesives with no accelerator mixed in. Set Time - It is always best to leave the patch for 12 hours to allow the glue to cure before inflating the boat. If you must inflate sooner, do not inflate to full pressure. Again, not allowing enough cure time is a common mistake with do it your self boat repair.
|
